Sunday, June 5, 2016

Chickens, Ducks and Other Fun Stuff


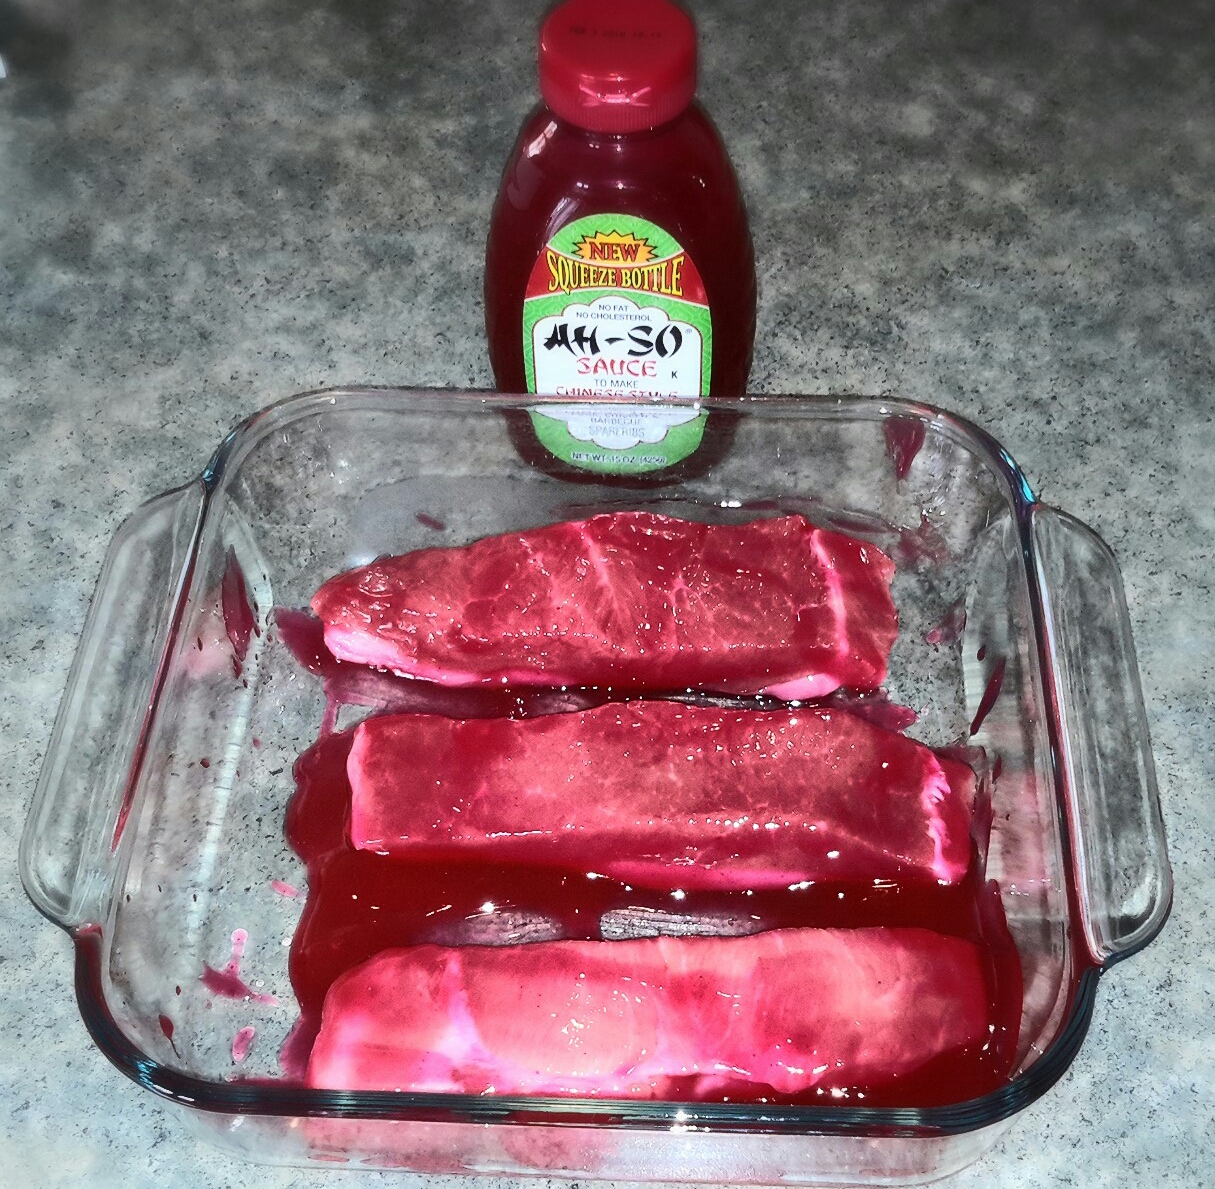
I am sure those of you that follow my blog have noticed that I have been away from it for some time now.  The break has not been intentional but a necessary one for a number of reasons. When I originally started this blog, I did so with the idea in mind that I was going to build the brand,"The Maine Harvest Table," for several future endeavors that I am working on now. At the time, the only thing I had to offer were good recipes and cooking techniques that I have learned or created over a number of years. I have every intention to continue to post recipes and other posts related to food. I am so passionate  about cooking but my love of food and working with it runs deeper than that.  Because of that, I knew at some point there would be a shift in the focus of the blog and that the shift would happen naturally when the time was right. That time has come, as I have felt the focus in my own life has shifted.  It has taken me away from cooking all the time and posting recipes regularly since the start of last summer.  

Raising chickens and ducks


At the beginning of March I decided to take on the responsibility of raising 6 baby chicks.  Just a week after getting the chicks, I purchased 2 baby Ancona ducks from a local breeder/farmer.  I understood that raising these babies was not necessarily going to be easy but I had no idea exactly how time consuming it was going to be.  Around the same time last year, I adopted 4 adult hens and was pleasantly surprised at how easy it was to care for them.  This is not so with baby chicks and most definitely not the case with ducks of any age unless you are better prepared than I am. Make no mistake my friends, the work that you put into raising poultry and water fowl is a labor of love even if you are not inclined to consider these birds your family pets.  You have to care about their health, their warmth, the food and water that you are feeding them.  You have to care and worry about a lot of things so even if you don't "love them," it has to be a labor of love just the same. 

A Family affair

For a little over two months, we raised and cared for these babies inside my home.  Having chickens and ducks in your home is not for the faint of heart and while I was prepared to deal with whatever that might bring, I was not so sure that my family would feel the same.  When I say that "we" raised them, I do mean we all did this together every day. I was plesantly surprised to find that my family not only accepted it but started getting involved from day one.  Of course it's easy to want to watch over these adorable babies in the beginning but as their little bodies grow, so does everything else.  Their poop gets bigger and stinkier so what was once a quick change of a couple of news papers and and two small handfuls of shavings becomes a full on cleaning of a larger brooding box and poop covered food and water dishes.  Without fail, my husband and my daughter were constantly there to help.  The chickens required a full cleaning of the brooding box every other day and fresh food and water at least twice daily.  The ducks on the other hand, had to be cleaned every single day first thing in the morning and as soon as I got home from work at night with several refills of food and fresh water throughout the day and evening.  It is stinky, messy and as they continue to grow, borders on disgusting at times.  While I had every intension of taking these chores on all by myself, it was a great relief for me to have their help and support.  

So what now?
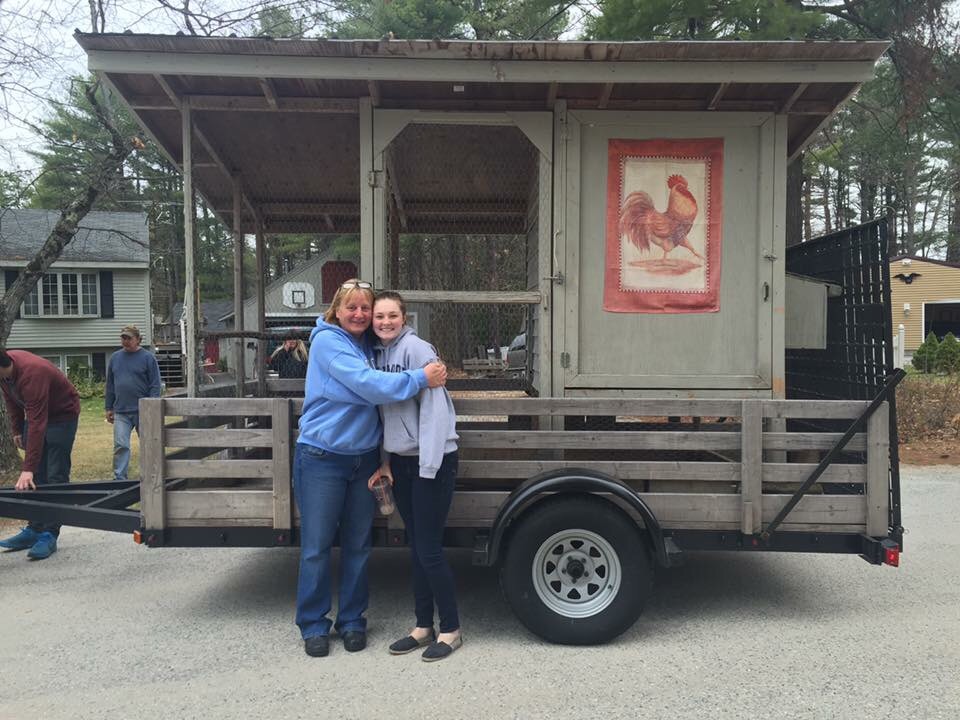
Now that the chickens and ducks are all fully feathered, we have moved them from the breezeway to their new homes outside.  We purchased a used coop for the chickens that was built by a family friend and hauled it home in a large trailer.  This took the time and effort of many people.  It was not just a family affair but we had few friends, and as I recall, a neighbor of a family friend to help us accomplish this task.  A couple weeks later we purchased a new duck house; which my husband and I moved ourselves.  We moved the ducks into it as soon as we had it placed on the ground and I do believe they were just as happy to make the move as we were to move them.

So what now?  Now we wait.  We continue the work of caring for them and while it is easier in a lot of ways having them out of the house, it is still work. The chickens are about 12 weeks old and the ducks are 10 weeks.  None of them will start laying until they are about 20 to 25 weeks of age.  When you decide to travel down the road of raising chicks and ducks for eggs, please understand that there is no immediate reward or instant gratification for the work that you have done to this point.  If you are lucky and you have been careful to do everything right in raising them, they have all survived and have been able to make the transition to the coop. That is your reward at this point and it will have to be enough for now.  Please don't take me the wrong way, I love every second of the time that I spend taking care of these birds.  I just want to be clear that the decision to do this should not be made without serious consideration to the time and commitment it will take. If you do make the decision to do so, I promise that it will be an extremely rewarding venture for you and your entire family...eventually!

Much more to come

Now that I have filled you in on what has been going on here at The Maine Harvest Table over the last few months, please be assured that this will not be the main focus of the blog.  It does seem to be of interest to many that I have talked to who have seen my Face Book posts about my trials and triumphs throughout this experience.  I have also amused people with stories of my many blunders and the funny antics of my little birds that often have people shaking their heads at me in disbelief.  Let me reassure anyone who thinks I suddenly lost my mind and I am now the crazy chicken lady next door trying to fill a void (which I have heard from a couple of people believe it or not). This is just a part of the focus here at The Maine Harvest Table that was not done without careful consideration and a lot of research.  It has been and will continue to be carried out with the best of intentions and with a driven purpose.  

It is my hope to use this platform to continue to share great recipes, but to also talk more about the idea of living sustainably as we continue to move toward that here ourselves.  I want to talk more about the amazing food and other products being produced as well as the people who produce them here in the State of Maine.  We have so many resources right here at our finger tips that so few people even think about much less take advantage of.  Soon I hope to be introducing and selling our very own specialty foods and other products. 

There are so many things that I want to do  and talk about here at The Maine Harvest Table and while I can't promise a post every day or even every week, I can promise that it will always be interesting.  We hope that you will stay tuned and continue to follow us on this journey wherever it takes us.  

Many thanks to all for your support!


Tuesday, February 23, 2016

Maine Off Shore Dinner


Today marks the one year anniversary of my very first post on The Maine Harvest Table and to celebrate this occasion, I felt it was important to share a dish that is authentically Maine.  The shore dinner is about as authentic of a dish one might experience in Maine and without a doubt the most delicious. The name of the dish not only describes where it is prepared and enjoyed but also where the main ingredients are harvested.  If you are ever lucky enough to enjoy an authentic Maine Shore Dinner, you will literally find yourself on one of the shores along Maine's beautiful coast eating seafood that has just been pulled from the ocean and dug out of the very sandy beach you are sitting on.  

My paternal grandmother and her siblings grew up in Prospect Harbor; which is a small town in Down East Maine.  Of the many stories my grandmother told me about her life growing up Down East, the one that I love the most is of her and her friends trapping lobsters, digging for clams and preparing their very own feast to enjoy right outside of their little shack along the shore of Prospect Harbor.  The idea of being able to catch, cook and eat the food you have just harvested right outside of your own home was simply amazing to me.  As I grew older, I understood that my grandmother's story was not unlike that of most people growing up Down East or on any other shoreline in Maine.  While this lifestyle is not uncommon amongst Mainers, it is uniquely Maine,  past, present and future.  It is the history of our people that we will continue to repeat and  be forever proud of!

Mainers are well known for the ability to overcome, improvise and adapt to whatever life throws our way.  That said, while it has been my intention to do a blog post about an authentic Maine Shore dinner, unfortunately I do not live Down East or on any other shoreline.  And while I do live fairly close to a number of southern Maine beaches, it is the middle of winter and I must admit that I am not willing to brave the bitter cold of the ocean air for this post.  I have managed to do the next best thing in creating what I have decided to call the Maine off shore dinner.  It is a really simple and quick preparation for a meal that is certain to please both Mainers and visitors of Maine alike. 

Here are the ingredients
Here we have seaweed fresh out of Casco Bay, mahogany clams (aka quahogs) also from Casco Bay, minced garlic, fresh lemons, Kate's Creamery real butter, chorizo sausage, new red potatoes, fresh corn, Old Bay seasoning, Allagash White Beer, Bar Harbor Lobster Stock, salt, pepper and last but not least, two soft shell Maine lobsters.  We have also decided to add fresh shrimp that are unfortunately not from Maine and also not necessarily an ingredient that you would find in a Maine shore dinner, but we were craving shrimp so we added them to the dish.  Feel free to add any other fresh seafood to the dish that you desire.  

The Preparation

The preparation of this dish is quite simple.  In a large pot, add the Allagash White Beer, Bar Harbor Lobster stock, about a cup of water, minced garlic, Old Bay Seasoning, two whole fresh lemons, a whole stick of Kate's Creamery (or any other) real butter, new red potatoes, fresh corn and salt and pepper to taste.  Bring all of these ingredients to a boil for about 5 minutes.

After 5 minutes, cover the ingredients with the seaweed and then place the lobster and chorizo sausage on top.  Reduce to medium heat and steam the lobsters for 5 minutes.  After 5 minutes, add the mahogany clams and the shrimp. Cover and steam for another 6 minutes or until the lobsters are completely cooked and all of the clams have opened up.  If not all of the clams have opened in 6 or 7 minutes, remove the lobsters and shrimp from the pot and cover to continue to steam the clams until they are done.  Then you are ready to plate.

To serve, remove the lobsters, clams, shrimp and chorizo from the pot.  Then remove the seaweed and spread it out onto a large serving platter.  Arrange the lobsters, clams, shrimp and sausage on top of the seaweed and then the potatoes, corn and lemons around the shell fish.  Serve with two small bowls of both the liquid from the pot and some melted butter on the side.

Whenever possible, you should experience this meal sitting on one of the many beaches along Maine's beautiful coast! If you do not live in Maine, or even if you do, and it is not possible to get to the shore, you can enjoy this meal the way I have prepared here in any setting that you are in at any time! 


Enjoy!


Sunday, November 15, 2015

Simple Starters

Pancetta Bruschetta

The holidays are fast approaching and with that comes entertaining and/or attending a number of gatherings where you will need to plan and prepare a dish or a number of dishes.  When you are entertaining and preparing the entire meal, it can be overwhelming so it's really helpful to have a number of easy recipes that do not take a lot of time to throw together.  Bruschetta is one of my favorite simple starters to serve.  It's easy and quick to put together and trust me when I say, it's a huge crowd pleaser.

Bruschetta is an Italian starter or antipasto that consists of grilled bread, rubbed with garlic and drizzled with olive oil.  The various different toppings you could serve on this bread are endless but the bruschetta that I am accustomed to eating and making typically involves diced tomatoes, garlic and basil.  I served this as a starter for a dinner that I was having recently and decided to add some pancetta to the mix.  It was absolutely delicious!  It was so good that I decided to make "simple starters" a regular addition to my blog and I knew that this would have to be the first.  Here is my super simple starter recipe for Pancetta Bruschetta.

Shopping list of ingredients

1 French baguette
6 ounce package of  pancetta
1 pint of grape or cherry tomatoes
1 bunch of basil
grated Parmesan cheese
1 lemon
2 cloves of garlic
olive oil


I first start by cooking my pancetta.  I buy this in the deli section at Hannaford.  It comes in a small 6 ounce package in the specialty meat section.  It is just enough pancetta for this recipe

Pan fry the pancetta bits for around 5 minutes or until they are crispy and golden brown.
Place the cooked pancetta on a plate lined with paper towels to absorb the grease and set aside to cool.

While your pancetta cools, you will prepare the topping.  I am using 1 pint of grape tomatoes.

I slice the grape tomatoes in half and add them to a small food processor along with a good bunch of basil, two garlic cloves, the juice of one lemon, about a tablespoon of olive oil, grated Parmesan cheese and salt and pepper to taste.

Chop the topping ingredients in the food processor until you have a nice chunky mixture similar to the consistency of salsa. At this point you will add the cooked and cooled pancetta to the mixture

Next you will cut the entire baguette into small slices that are about an inch and a half thick. I only used a half of a baguette for the sake of saving time while preparing this blog post but the recipe is for a whole baguette.

Place the slices of the baguette onto a lined sheet pan and drizzle the slices generously with olive oil.

Place the pan into the oven under the broiler set at high for 5 minutes or until the slices are golden brown and crusty on the outside.

Remove the pan from the oven and add the prepared topping mixture to the slices then sprinkle each slice with as much grated Parmesan as you prefer and drizzle some additional olive oil over each slice.

Place the pan back into the oven under the broiler for about another 3 minutes. Remove from the oven and sprinkle additional sea salt and cracked black pepper to taste.

To serve, place the bruschetta slices onto a platter with a small ramekin of olive oil in the center of the platter for dipping.  I always like to add some fresh cracked black pepper and sea salt to the olive oil for added flavor.  You can also add some fresh herbs to infuse some flavor into the oil.   

As I mentioned before this is a huge crowd pleaser.  It is almost always the first thing to go at my gatherings and is loved by both kids and adults alike.  If you are one that can't cook or do not like to cook, this is a great starter for you if you find yourself having to come up with something to make for a gathering.  This is truly a super simple starter that anyone can make but will make a big impression on your guest!


Enjoy!


Sunday, November 1, 2015

Down East Asia ~ Hot & Sour Soup


Fall is by far my favorite season of the year for a number of reasons but mostly because it is my season to get back into the kitchen and start cooking my favorite comfort foods.  At the first hint of crisp fall air, I immediately feel compelled to start cooking warm and hearty meals for my family to enjoy.  This is the time of year when I am most creative in the kitchen.

There isn't any other meal I can think of that is as comforting as a hot soup on a chilly fall day in Maine.  I make a lot of soups in the fall and when I do, I make them in big batches so I can share with family, friends and co-workers.  My personal favorite comfort soup is hot and sour soup.  I had this soup for the first time about 5 years ago from a Chinese take out restaurant and instantly fell in love with it.  I knew immediately that I needed to learn how to make this soup but I also knew that it would not come easily to me. I began studying and trying variations of different recipes over and over again until I finally came up with one of my own that I am quite proud of.

There are a number of Asian cultures that each have their own versions of hot and sour soup.  I prefer the Chinese version and more specifically, szechuan style hot and sour.  This is the style that you will find most frequently in local Asian restaurants.  Mine is similar to what you will find in many of these restaurants but I'd like to think it's healthier and in some cases more complex in flavor.  Without further ado...here is my very own hot and sour soup recipe.

The Ingredients
Here I have Chinese rice wine, dark soy sauce, regular soy sauce, sesame oil, rice wine vinegar, Chinese barbecue sauce, chicken stock, baby bok choy, shiitake mushrooms, diced carrots, eggs, dried lily buds, white pepper, ginger, garlic, red chili pepper and boneless pork ribs.

First start by preparing the pork ribs to cook
Brush the boneless pork ribs liberally with the Chinese barbecue sauce and place in a pre-heated oven at 375 degrees until the pork is completely cooked.

Next you will start to prepare the items for the base of the soup.
Mince one large clove of garlic and a 1 inch piece of ginger and set aside

Then you will slice your red chili pepper (the one above is a Thai chili) and remove the rib and most of the seeds.  If you like it extra hot then you can leave the rib and seeds in the chili and chop the chili into small pieces.  Cut the chilies so that they are big enough to skim out of the broth later.  

Next you will prepare the vegetables
I have purchased both the shiitake mushrooms and carrots pre-cut and ready to go so first I start with the baby bok choy. I used two small bunches of baby bok choy which I purchased at On The Vine in Scarborough.  Cut the stalks of the bok choy in thin slices at an angle all the way up the stalk until you get to the leafy part. Set the leafy part aside and continue cutting the rest of the stalks.  Once the stalks are chopped, roll up the leaves of the baby bok choy and start slicing the leaves into very thin long pieces.  Once you are done slicing the leaves, give them a couple of rough chops so they are not too long and stringy when you are trying to eat them.

Preparing the dried lily buds
The lily buds that I use, and the only ones that you are likely to find around here, are dried.  To pre-pare your lily buds, you will first need to re-hydrate them.  When I first started working with these, I would just throw the dried buds right into the soup.  That is a mistake!  There are parts of the lily bud that are course and hard and not pleasant to bite into.  For this reason you will want to re-hydrate the lily buds before you add them to the soup so that you can cut off any of the inedible parts of the bud.

This is what your lily buds will look like when they are completely hydrated

Then you will lay the lily buds out on a cutting board and cut off any of the course or hard ends of the buds

Once you are done cutting the ends, give the buds one or two rough chops so they are not too long.

Now you are ready to start cooking the soup
In a large pot over medium heat, add two tablespoons of peanut oil.  When the oil is heated, add your minced garlic and ginger along with the chopped red chili pepper and cook for about a minute or until the garlic and ginger become somewhat translucent and the chili pepper has softened.  Stir frequently while cooking so you do not burn your garlic.  

Next, add a tablespoon of Chinese rice wine and stir to deglaze the bottom of the pot.  Then you will pour in 6 to 8 cups of prepared chicken stock.  I used organic store bought stock but I have made my own a couple of times and if you are feeling ambitious, feel free to make your own as well.  

After adding the chicken stock, bring to a boil and then add 1/4 of a cup of soy sauce, 1/4 of a cup rice wine vinegar and 1 tablespoon of dark soy sauce.  I started using  the dark soy sauce to get a darker color broth initially but it does add another depth of flavor that I had not achieved in the soups I made previous to using it. 
At this point you will want to remove all of the large pieces of chili pepper.  

Next you will add the carrots and the stalks of bok choy when the broth has come to a boil.  Reduce the heat and let simmer while you prepare the cooked pork to add to the soup. This is what it should look like at this point.

Once your pork is cooked and has cooled, cut the meat of the rib into think slices
Cut each of the slices in half and then then chop into very small and thin pieces as shown in the picture below

When you are done preparing the pork add the sliced pork, the mushrooms and the bok choy leaves to the broth and bring to a boil again.

While you are waiting for your broth to come to a boil, prepare your eggs to add to the soup.  
Add sesame seed oil to two cracked eggs and very lightly beat the eggs and set aside.

This is where I do my final taste test and add any final and/or additional items based on my personal taste.  I add the white pepper and I typically add a little more rice wine vinegar.  There are times when I have had to add a good pinch or sugar rather than more vinegar because the soup may have been a little too sour.  I will also typically add more chilies at this point in the form of hot chili oil; which also contains chili seeds. 

 This is the hot chili oil that I use.
You can find the chili oil, lily buds and any of the other sauces that I have used and Trans Asian market in Biddeford.


When you are done adding the final and any additional ingredients to the soup, very slowly add your eggs to the mixture.  As you are pouring the eggs in, stir vigorously with a fork so the egg will break apart and feather as it hits the hot broth.  This is how you get the light feathery eggs that you see floating in your hot and sour soup in the restaurants.  

When you are done with this step, your soup should look something like this and you are done.  Congratulations...you have made hot and sour soup!

This is an extremely versatile soup and you can add just about anything you prefer for vegetables and protein.  You will typically see tofu in a hot and sour soup.  I did not use tofu in this recipe as my family does not like it but I have used it before and it is a delicious addition.  Other ingredients you might want to consider are shrimp, chicken, bamboo shoots, water chestnuts, different types of mushrooms, and napa or savoy cabbages.  The possibilities are endless...it really just depends on your taste. You can also thicken this broth after adding the egg with a mixture of cornstarch and cold water.  I do not like to thicken my broth but many do prefer it that way.  

It is really the base of this soup that is the star of the show no matter what you decide to add for proteins or vegetables.  All of the different textures and the amazing depths of flavor in hot and sour soup make this one of the all time best soups in my opinion.  I know many others are as passionate about it as I am.  People have been asking me for this recipe for years but I would not share it until I was certain that I had perfected it to my own taste at least.  

I am hope that you will enjoy this recipe and perhaps create your very own recipe for hot and sour soup using some of the ideas that you have seen here.  If so, I would love to hear about your experiences in making this amazing soup!


Enjoy!


Wednesday, October 14, 2015

Summer Harvest Soup

Roasted Green Tomato & Basil Soup with Homeade Cheesy Croutons
After months of careful preparation and hard work in the gardens throughout the summer, fall is now upon us and the summer harvest has come and gone. I still have a few cold crop items that are growing and doing better than expected but for the most part, the growing season for Maine gardeners has come to an end. Over the past month, I have been harvesting and using up or sharing the last of the vegetables and herbs that my gardens have produced.  Overall I have been pleased with the production from all three gardens.  It was not as good as I had hoped but it was better than last year.  I worked harder and longer this year than ever before so the progress made from last year to this has been rewarding and has motivated me to work even harder and longer next year.

One of my most successful and abuntant vegetable crops this year was tomatoes; which are technically botanical fruits because they are basically a seed pod.  More specifically they are a fleshy sweet or sour product of a flowering plant that contains seeds.  If I am being honest, I really had an over abundance of green tomatoes that would not ripen no matter what I did.  I tried all the supposed tricks of the trade and still could not get even the slightest tint of red on those brilliant emerald botanical fruits.  

Being the impatient gardener and cook that I am, I finally decided that I could not wait a moment longer for the tomatoes to ripen.  I decided that I would find a way to use them just the way they were.  With my multiple green tomatoes coupled with my unrelenting impatience to let nature take its course, I created a roasted green tomato and basil soup.  It is quite simply the most delicious tomato soup that I have ever tasted in my life!  Here is how I did it.

First I started with 2 to 3 pounds of green tomatoes that I cut in half and placed in a shallow glass baking pan.
I drizzled a generous amount of olive oil over the tomatoes and seasoned with sea salt and cracked black pepper.  Then I placed the pan in a pre-heated oven at 375 degrees.  Roast the tomatoes until they become soft and have started to brown on the outside a bit.  Remove them from the oven and set aside.

In a medium to large soup pot, add two tablespoons of olive oil and two to three crushed cloves of garlic and sautee over medium high heat. Add sea salt, pepper and a couple pinches of crushed red pepper flakes (optional) as you sautee the garlic until it has softened and starts to become translucent.  Be careful not to burn the garlic.  

At this point, add the roasted green tomatoes.  Crush the tomatoes with the back of a spoon as you stir and sautee them with the garlic.  Once the tomatoes are broken down add 4 cups of vegetable or chicken stock and bring to a boil.  Once you have brought the mixture to a boil, add about a quarter cup of fresh basil leaves and simmer for a few minutes.  
After simmering for a few minutes, you will blend the mixture with an immersion blender.  If you do not have a immersion blender, a regular blender will work just fine and is actually a little faster.  If you are using a regular blender, please make sure the cover is secure before starting to blend the hot mixture.  
Blend the mixture with the immersion blender or regular blender until all of the tomatoes are completely broken down and the mixture has thickened and is smooth. Strain the mixture and pour back into the pot to simmer for 15 minutes. Stir occasionally and add salt and pepper (or any other seasoning you like) to taste as the soup is simmering. I also like to add a couple of pinches of freshly grated parmesean cheese to the soup as it is simmering.  

While the soup is still simmering, it's time to make the cheesy croutons. I like to use a french baguette for these but you can use any crusty bread that you prefer.  Using a bread knife, cut the bread into half inch slices and place on a lined baking sheet. Drizzle the slices with olive oil and sprinkle each slice with your favorite shredded cheese.  Place into the oven under the broiler until the cheese is melted and the bread has started to brown.  

To serve, ladle the soup into a medium to large soup bowl and place a cheesy crouton in the middle of the bowl on top of the soup.  Garnish with a couple of basil leaves and add salt and pepper to taste.

I was surprised to find that this soup had all of the familiar notes of a regular red tomato soup but also offers the incredible fresh, tangy and floral flavors from the green tomato.  It's everyone's favorite comfort soup with a little twist that is both refreshing and delicious and can be served hot or cold.  It just doesn't get any better than that!


Enjoy!


Saturday, July 18, 2015

Upta Camp Skillet Suppah

Spicey Honey Glazed Chicken with a Roasted Root Vegetable Medley


Before I start with my recipe for this dish, let me just get one thing out of the way first. Yes...you read the title of this post correctly; Upta Camp is really a thing and for most Mainers it is the absolute best place on earth. If you live in Maine or are familiar with our quirky ways then you know what camp is.  In Maine we do not have lake homes or cozy cottages...we have camp.  If you do not have a camp of your own, you go to a friends camp or rent a camp but at some point in time you have been to camp and if you are a real Mainer, you loved it and have gone back again and again.

I own a camp, along with my husband and two best friends, on beautiful Moosehead Lake.  It is located at the very top of the lake in the North West Carry in a quiet little cove where there is no electricity, cell phone service or running water.  There is no place like it and there is no place on this earth I would rather be than upta camp!  I could go on and on about camp but I will share more in a later post on my Maine people and places page.  Now lets get to the business of cooking at camp!

Cooking for a large group of people at camp can be somewhat challenging but we always eat well.  Every once in a while we have some guests that love to cook and will help out in the kitchen but for the most part, I am the camp cook.  I love cooking for people at home but I especially love cooking for people at camp.  Somehow the food just tastes better and everyone looks forward to a good camp dinner at the end of each day.

For this camp dinner I decided to break out my trusty cast iron skillet.  It was a chilly rainy day at the end of June so this was a nice hearty dinner to warm us up.  This is also a great meal because it requires only two pans to cook the whole meal.  Honestly, it could have been done in the cast iron skillet alone but I used a sheet pan so I could accomplish two things at the same time.  Here is how I put this camp meal together.

First I started by cutting 3 beets, 4 carrots and 2 large potatoes into medium size cubes.  You want to make sure that you cut everything as close to the same size as you can so they are all done cooking at the same time.  
I spread the cubes out evenly on a foil lined sheet pan, season them with salt, pepper and olive oil and stick them in the oven for about 25 minutes at 350 degrees.

While the veggies are baking, heat the cast iron skillet on high and add two to three tablespoons of olive oil to the pan.  I season 4 bone-in chicken thighs with the few items that I could find in my camp cupboards.
I found some salt, pepper, dried thyme, natures seasoning and a meat rub called Spice Monkey.  
Once you have seasoned the chicken and your pan is nice and hot, add the chicken thighs to the pan just until the skin is brown and crispy on both sides.  Once you have browned the chicken, remove it from the pan and then deglaze the pan by pouring a couple of tablespoons of wine or chicken stock into the pan and scraping the bits of chicken from the bottom.  Do not, and I repeat, DO NOT discard the juices and bits of chicken from the bottom of your pan.  This is where all of your big flavor comes from so just leave it right where it is when you are done deglazing!

Next, remove your partially roasted vegetables from the oven, add them to the cast iron skillet and then place the 4 chicken thighs on top of the veggies.  Add a little more salt, pepper, olive oil, and Spice Monkey and once all of those ingredients are in the pan it is time to add the secret incredient...two tablespoons of Maine Made Honey.

Cover the entire skillet with tin foil or a cover if you have one and place the pan in the oven and bake at 425 degrees for about 30 to 35 minutes or until the chicken is cooked all the way through.  

This skillet dinner was one of the most flavorful dishes that I have ever made at camp.  The addition of the honey really kicked the flavor of this meal up a notch.  It was the perfect accompaniment to the spice rub on the chicken and the earthy flavors of the root vegetables.  This recipe fed two of us quite well and we had some left over for lunch the next day. It would be a fantastic meal to make for a larger crowd. 

 This rustic skillet dish is just the kind of heart warming and welcoming meal to  keep your guest wanting to come back Upta Camp again and again!


Enjoy!