Sunday, November 1, 2015

Down East Asia ~ Hot & Sour Soup


Fall is by far my favorite season of the year for a number of reasons but mostly because it is my season to get back into the kitchen and start cooking my favorite comfort foods.  At the first hint of crisp fall air, I immediately feel compelled to start cooking warm and hearty meals for my family to enjoy.  This is the time of year when I am most creative in the kitchen.

There isn't any other meal I can think of that is as comforting as a hot soup on a chilly fall day in Maine.  I make a lot of soups in the fall and when I do, I make them in big batches so I can share with family, friends and co-workers.  My personal favorite comfort soup is hot and sour soup.  I had this soup for the first time about 5 years ago from a Chinese take out restaurant and instantly fell in love with it.  I knew immediately that I needed to learn how to make this soup but I also knew that it would not come easily to me. I began studying and trying variations of different recipes over and over again until I finally came up with one of my own that I am quite proud of.

There are a number of Asian cultures that each have their own versions of hot and sour soup.  I prefer the Chinese version and more specifically, szechuan style hot and sour.  This is the style that you will find most frequently in local Asian restaurants.  Mine is similar to what you will find in many of these restaurants but I'd like to think it's healthier and in some cases more complex in flavor.  Without further ado...here is my very own hot and sour soup recipe.

The Ingredients
Here I have Chinese rice wine, dark soy sauce, regular soy sauce, sesame oil, rice wine vinegar, Chinese barbecue sauce, chicken stock, baby bok choy, shiitake mushrooms, diced carrots, eggs, dried lily buds, white pepper, ginger, garlic, red chili pepper and boneless pork ribs.

First start by preparing the pork ribs to cook
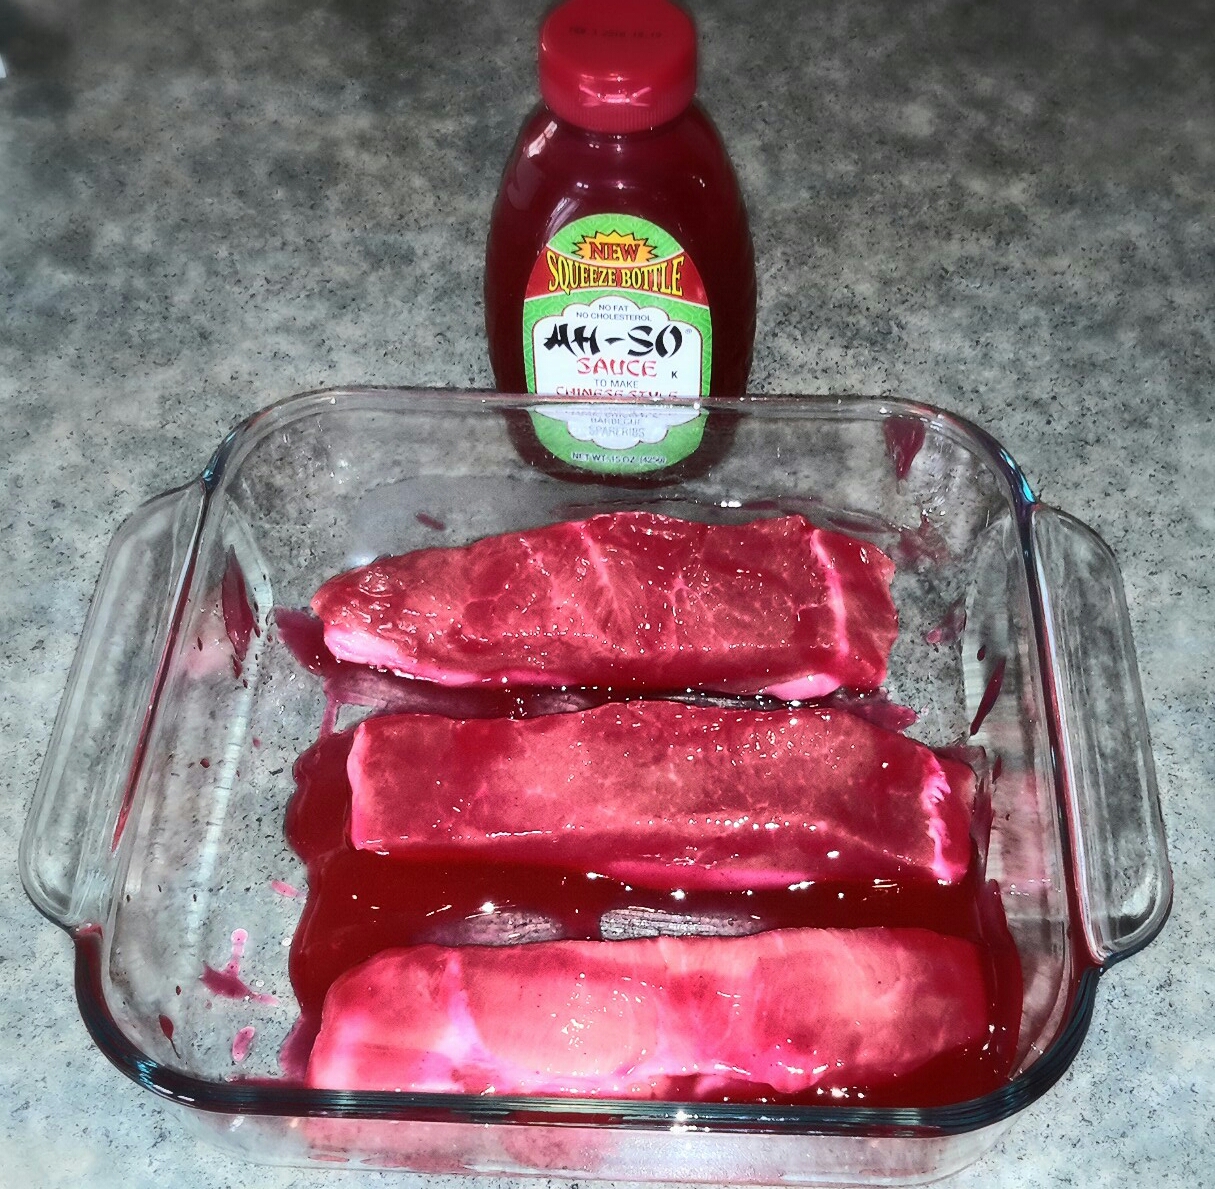
Brush the boneless pork ribs liberally with the Chinese barbecue sauce and place in a pre-heated oven at 375 degrees until the pork is completely cooked.

Next you will start to prepare the items for the base of the soup.
Mince one large clove of garlic and a 1 inch piece of ginger and set aside

Then you will slice your red chili pepper (the one above is a Thai chili) and remove the rib and most of the seeds.  If you like it extra hot then you can leave the rib and seeds in the chili and chop the chili into small pieces.  Cut the chilies so that they are big enough to skim out of the broth later.  

Next you will prepare the vegetables
I have purchased both the shiitake mushrooms and carrots pre-cut and ready to go so first I start with the baby bok choy. I used two small bunches of baby bok choy which I purchased at On The Vine in Scarborough.  Cut the stalks of the bok choy in thin slices at an angle all the way up the stalk until you get to the leafy part. Set the leafy part aside and continue cutting the rest of the stalks.  Once the stalks are chopped, roll up the leaves of the baby bok choy and start slicing the leaves into very thin long pieces.  Once you are done slicing the leaves, give them a couple of rough chops so they are not too long and stringy when you are trying to eat them.

Preparing the dried lily buds
The lily buds that I use, and the only ones that you are likely to find around here, are dried.  To pre-pare your lily buds, you will first need to re-hydrate them.  When I first started working with these, I would just throw the dried buds right into the soup.  That is a mistake!  There are parts of the lily bud that are course and hard and not pleasant to bite into.  For this reason you will want to re-hydrate the lily buds before you add them to the soup so that you can cut off any of the inedible parts of the bud.

This is what your lily buds will look like when they are completely hydrated

Then you will lay the lily buds out on a cutting board and cut off any of the course or hard ends of the buds

Once you are done cutting the ends, give the buds one or two rough chops so they are not too long.

Now you are ready to start cooking the soup
In a large pot over medium heat, add two tablespoons of peanut oil.  When the oil is heated, add your minced garlic and ginger along with the chopped red chili pepper and cook for about a minute or until the garlic and ginger become somewhat translucent and the chili pepper has softened.  Stir frequently while cooking so you do not burn your garlic.  

Next, add a tablespoon of Chinese rice wine and stir to deglaze the bottom of the pot.  Then you will pour in 6 to 8 cups of prepared chicken stock.  I used organic store bought stock but I have made my own a couple of times and if you are feeling ambitious, feel free to make your own as well.  

After adding the chicken stock, bring to a boil and then add 1/4 of a cup of soy sauce, 1/4 of a cup rice wine vinegar and 1 tablespoon of dark soy sauce.  I started using  the dark soy sauce to get a darker color broth initially but it does add another depth of flavor that I had not achieved in the soups I made previous to using it. 
At this point you will want to remove all of the large pieces of chili pepper.  

Next you will add the carrots and the stalks of bok choy when the broth has come to a boil.  Reduce the heat and let simmer while you prepare the cooked pork to add to the soup. This is what it should look like at this point.

Once your pork is cooked and has cooled, cut the meat of the rib into think slices
Cut each of the slices in half and then then chop into very small and thin pieces as shown in the picture below

When you are done preparing the pork add the sliced pork, the mushrooms and the bok choy leaves to the broth and bring to a boil again.

While you are waiting for your broth to come to a boil, prepare your eggs to add to the soup.  
Add sesame seed oil to two cracked eggs and very lightly beat the eggs and set aside.

This is where I do my final taste test and add any final and/or additional items based on my personal taste.  I add the white pepper and I typically add a little more rice wine vinegar.  There are times when I have had to add a good pinch or sugar rather than more vinegar because the soup may have been a little too sour.  I will also typically add more chilies at this point in the form of hot chili oil; which also contains chili seeds. 

 This is the hot chili oil that I use.
You can find the chili oil, lily buds and any of the other sauces that I have used and Trans Asian market in Biddeford.


When you are done adding the final and any additional ingredients to the soup, very slowly add your eggs to the mixture.  As you are pouring the eggs in, stir vigorously with a fork so the egg will break apart and feather as it hits the hot broth.  This is how you get the light feathery eggs that you see floating in your hot and sour soup in the restaurants.  

When you are done with this step, your soup should look something like this and you are done.  Congratulations...you have made hot and sour soup!

This is an extremely versatile soup and you can add just about anything you prefer for vegetables and protein.  You will typically see tofu in a hot and sour soup.  I did not use tofu in this recipe as my family does not like it but I have used it before and it is a delicious addition.  Other ingredients you might want to consider are shrimp, chicken, bamboo shoots, water chestnuts, different types of mushrooms, and napa or savoy cabbages.  The possibilities are endless...it really just depends on your taste. You can also thicken this broth after adding the egg with a mixture of cornstarch and cold water.  I do not like to thicken my broth but many do prefer it that way.  

It is really the base of this soup that is the star of the show no matter what you decide to add for proteins or vegetables.  All of the different textures and the amazing depths of flavor in hot and sour soup make this one of the all time best soups in my opinion.  I know many others are as passionate about it as I am.  People have been asking me for this recipe for years but I would not share it until I was certain that I had perfected it to my own taste at least.  

I am hope that you will enjoy this recipe and perhaps create your very own recipe for hot and sour soup using some of the ideas that you have seen here.  If so, I would love to hear about your experiences in making this amazing soup!


Enjoy!


Wednesday, October 14, 2015

Summer Harvest Soup

Roasted Green Tomato & Basil Soup with Homeade Cheesy Croutons
After months of careful preparation and hard work in the gardens throughout the summer, fall is now upon us and the summer harvest has come and gone. I still have a few cold crop items that are growing and doing better than expected but for the most part, the growing season for Maine gardeners has come to an end. Over the past month, I have been harvesting and using up or sharing the last of the vegetables and herbs that my gardens have produced.  Overall I have been pleased with the production from all three gardens.  It was not as good as I had hoped but it was better than last year.  I worked harder and longer this year than ever before so the progress made from last year to this has been rewarding and has motivated me to work even harder and longer next year.

One of my most successful and abuntant vegetable crops this year was tomatoes; which are technically botanical fruits because they are basically a seed pod.  More specifically they are a fleshy sweet or sour product of a flowering plant that contains seeds.  If I am being honest, I really had an over abundance of green tomatoes that would not ripen no matter what I did.  I tried all the supposed tricks of the trade and still could not get even the slightest tint of red on those brilliant emerald botanical fruits.  

Being the impatient gardener and cook that I am, I finally decided that I could not wait a moment longer for the tomatoes to ripen.  I decided that I would find a way to use them just the way they were.  With my multiple green tomatoes coupled with my unrelenting impatience to let nature take its course, I created a roasted green tomato and basil soup.  It is quite simply the most delicious tomato soup that I have ever tasted in my life!  Here is how I did it.

First I started with 2 to 3 pounds of green tomatoes that I cut in half and placed in a shallow glass baking pan.
I drizzled a generous amount of olive oil over the tomatoes and seasoned with sea salt and cracked black pepper.  Then I placed the pan in a pre-heated oven at 375 degrees.  Roast the tomatoes until they become soft and have started to brown on the outside a bit.  Remove them from the oven and set aside.

In a medium to large soup pot, add two tablespoons of olive oil and two to three crushed cloves of garlic and sautee over medium high heat. Add sea salt, pepper and a couple pinches of crushed red pepper flakes (optional) as you sautee the garlic until it has softened and starts to become translucent.  Be careful not to burn the garlic.  

At this point, add the roasted green tomatoes.  Crush the tomatoes with the back of a spoon as you stir and sautee them with the garlic.  Once the tomatoes are broken down add 4 cups of vegetable or chicken stock and bring to a boil.  Once you have brought the mixture to a boil, add about a quarter cup of fresh basil leaves and simmer for a few minutes.  
After simmering for a few minutes, you will blend the mixture with an immersion blender.  If you do not have a immersion blender, a regular blender will work just fine and is actually a little faster.  If you are using a regular blender, please make sure the cover is secure before starting to blend the hot mixture.  
Blend the mixture with the immersion blender or regular blender until all of the tomatoes are completely broken down and the mixture has thickened and is smooth. Strain the mixture and pour back into the pot to simmer for 15 minutes. Stir occasionally and add salt and pepper (or any other seasoning you like) to taste as the soup is simmering. I also like to add a couple of pinches of freshly grated parmesean cheese to the soup as it is simmering.  

While the soup is still simmering, it's time to make the cheesy croutons. I like to use a french baguette for these but you can use any crusty bread that you prefer.  Using a bread knife, cut the bread into half inch slices and place on a lined baking sheet. Drizzle the slices with olive oil and sprinkle each slice with your favorite shredded cheese.  Place into the oven under the broiler until the cheese is melted and the bread has started to brown.  

To serve, ladle the soup into a medium to large soup bowl and place a cheesy crouton in the middle of the bowl on top of the soup.  Garnish with a couple of basil leaves and add salt and pepper to taste.

I was surprised to find that this soup had all of the familiar notes of a regular red tomato soup but also offers the incredible fresh, tangy and floral flavors from the green tomato.  It's everyone's favorite comfort soup with a little twist that is both refreshing and delicious and can be served hot or cold.  It just doesn't get any better than that!


Enjoy!


Saturday, July 18, 2015

Upta Camp Skillet Suppah

Spicey Honey Glazed Chicken with a Roasted Root Vegetable Medley


Before I start with my recipe for this dish, let me just get one thing out of the way first. Yes...you read the title of this post correctly; Upta Camp is really a thing and for most Mainers it is the absolute best place on earth. If you live in Maine or are familiar with our quirky ways then you know what camp is.  In Maine we do not have lake homes or cozy cottages...we have camp.  If you do not have a camp of your own, you go to a friends camp or rent a camp but at some point in time you have been to camp and if you are a real Mainer, you loved it and have gone back again and again.

I own a camp, along with my husband and two best friends, on beautiful Moosehead Lake.  It is located at the very top of the lake in the North West Carry in a quiet little cove where there is no electricity, cell phone service or running water.  There is no place like it and there is no place on this earth I would rather be than upta camp!  I could go on and on about camp but I will share more in a later post on my Maine people and places page.  Now lets get to the business of cooking at camp!

Cooking for a large group of people at camp can be somewhat challenging but we always eat well.  Every once in a while we have some guests that love to cook and will help out in the kitchen but for the most part, I am the camp cook.  I love cooking for people at home but I especially love cooking for people at camp.  Somehow the food just tastes better and everyone looks forward to a good camp dinner at the end of each day.

For this camp dinner I decided to break out my trusty cast iron skillet.  It was a chilly rainy day at the end of June so this was a nice hearty dinner to warm us up.  This is also a great meal because it requires only two pans to cook the whole meal.  Honestly, it could have been done in the cast iron skillet alone but I used a sheet pan so I could accomplish two things at the same time.  Here is how I put this camp meal together.

First I started by cutting 3 beets, 4 carrots and 2 large potatoes into medium size cubes.  You want to make sure that you cut everything as close to the same size as you can so they are all done cooking at the same time.  
I spread the cubes out evenly on a foil lined sheet pan, season them with salt, pepper and olive oil and stick them in the oven for about 25 minutes at 350 degrees.

While the veggies are baking, heat the cast iron skillet on high and add two to three tablespoons of olive oil to the pan.  I season 4 bone-in chicken thighs with the few items that I could find in my camp cupboards.
I found some salt, pepper, dried thyme, natures seasoning and a meat rub called Spice Monkey.  
Once you have seasoned the chicken and your pan is nice and hot, add the chicken thighs to the pan just until the skin is brown and crispy on both sides.  Once you have browned the chicken, remove it from the pan and then deglaze the pan by pouring a couple of tablespoons of wine or chicken stock into the pan and scraping the bits of chicken from the bottom.  Do not, and I repeat, DO NOT discard the juices and bits of chicken from the bottom of your pan.  This is where all of your big flavor comes from so just leave it right where it is when you are done deglazing!

Next, remove your partially roasted vegetables from the oven, add them to the cast iron skillet and then place the 4 chicken thighs on top of the veggies.  Add a little more salt, pepper, olive oil, and Spice Monkey and once all of those ingredients are in the pan it is time to add the secret incredient...two tablespoons of Maine Made Honey.

Cover the entire skillet with tin foil or a cover if you have one and place the pan in the oven and bake at 425 degrees for about 30 to 35 minutes or until the chicken is cooked all the way through.  

This skillet dinner was one of the most flavorful dishes that I have ever made at camp.  The addition of the honey really kicked the flavor of this meal up a notch.  It was the perfect accompaniment to the spice rub on the chicken and the earthy flavors of the root vegetables.  This recipe fed two of us quite well and we had some left over for lunch the next day. It would be a fantastic meal to make for a larger crowd. 

 This rustic skillet dish is just the kind of heart warming and welcoming meal to  keep your guest wanting to come back Upta Camp again and again!


Enjoy!


Saturday, June 13, 2015

Super Food Side Dish

Grill Fire Roasted Fiddleheads
In one of my very first posts, I shared a recipe for pickled fiddleheads that has been quite popular with my followers so I thought I would share another one of my favorite preparations for a super food side dish. You can honestly do just about anything with them; they are not just a side dish.  You can use them as a pizza topping, in a salad, in a casserole, and in a sandwich...the possibilities are endless.  The traditional Maine way to prepare them is to simply boil or steam them with some salt pork and serve them slathered in butter and a little vinegar.  There is nothing fancy at all about the Maine way but they are delicious and the preparation has stood the test of time.

Fiddleheads are rich in vitamins and minerals and contain antioxidants along with omega-3 and omega-6 fatty acids.  They are used throughout the world in many different cultures and cuisines.  The fiddlehead otherwise know as the Ostrich Fern grows wild and are harvested in the Northeastern part of North America and are a traditional dish of Northern New England (especially Maine).  In mid to late spring here in Maine you can find them being sold at farm stands, supermarkets, farmers markets and even on the side of the road throughout the State.  

Mainers are quite serious about their fiddleheads and the season for harvesting is very short, so at the first sign of those little green heads emerging from the ground...it's on!  
As I mentioned earlier, there are many ways to use fiddleheads but whatever way you decide to use them they must always be cooked first.  Fiddleheads can be toxic if not cooked properly so after they have been thoroughly cleaned and dried you will need to boil or steam them for about 10 to 15 minutes.  

The fiddleheads used in this recipe were harvested in Presque Isle, Maine by my father.  They are big and hearty and perfect for holding up to the heat of the grill.  This is a super quick and easy super food side dish to prepare especially when someone else has picked, cleaned and bagged them for you already.  Here is how I prepared them

Even though I am grilling these fiddleheads, they still need to be boiled or steamed first.  After they have been properly boiled, place them in a strainer or a grill pan (shown above) and let the water drain out of them for a bit.  Once the water has been drained, drizzle the fiddleheads with olive oil and balsamic vinegar and then add salt, pepper, garlic and onion powder.  I use garlic powder because fresh garlic would burn in the pan very quickly from the heat of the grill. 

Grill the fiddleheads over medium high heat for 15 to 20 minutes or until they start to brown up and crisp a bit.  Remove them from the heat and add a little more balsamic vinegar, olive oil, sea salt, cracked black pepper and a pinch of crushed red pepper flakes (optional).  Give the fiddleheads a good toss to coat them evenly and serve.

Cooking fiddleheads this way reduces the bitterness and I found them to be really quite sweet.  I personally like the bitterness of the fiddlehead but some people will not eat them because of it so this is a great way to prepare them if you find their natural bitterness to be off putting.  It does not matter how you prepare them or what you serve the with...the important thing is that you eat them!


Enjoy!


Saturday, June 6, 2015

Dim Sum Surprise

Cheese Steak Egg Rolls
I love egg rolls, I love making egg rolls and most importantly, I love eating egg rolls.  In my opinion there is no appetizer on this earth better than a good egg roll.  It took me years to perfect the art of making egg rolls and when I finally got it right, it was one of my proudest moments in the kitchen! I know that sounds silly but trust me when I say, there is an art to making an egg roll.

One evening a couple of years ago, my husband and I were watching one of our favorite cooking shows; which featured a food truck and their signature menu item was Philly cheese steak egg rolls.  The concept was interesting to me but as hard as I had worked to perfect an authentic egg roll, I rejected the idea instantly.  Then I looked over at my husband and realized that it was love at first sight for him and I would be attempting to make these cheese steak egg rolls soon. 

It was not too long after watching the show that I decided to surprise my family and make what I now call steak rolls.  There were an instant hit and I have been serving them ever since.  I do not serve them more than my "real" egg rolls but I have to admit that when I am looking for a quick meal to serve and a little change of pace, this is one of my go to recipes.  Here is how I do it...

Preparing the ingredients
First I start by cutting red and green bell peppers in long and thin slices

Next I thinly slice about one and a half pounds of beef short ribs.  You can use any cut of beef that you prefer and to make the process easier, you can purchase shaved steak from the grocery store but I would not use steakums or any other kind of processed and frozen beef product.  

When I am done preparing the vegetables and meat, I throw the bell peppers into a saute pan with about a table spoon of olive oil, sea salt and pepper to taste and cook until they are good and tender. Remove the peppers from the pan and place them onto a paper plate that is covered with a few paper towels to absorb the grease and moisture.  Place the plate of peppers into the refrigerator to cool. 

Next I add another tablespoon of olive oil to the pan and then add the beef short ribs.  Season the short ribs with sea salt and cracked black pepper and one clove of thinly diced garlic.  Cook the beef to medium rare and remove from the pan and also place these on a paper plate with paper towels and place in the refrigerator to cool.  The cooling process only takes about 10 minutes as long as you spread the meat out on the plate.  Use two plates if you have to in order to spread all the pieces out properly. *Note- If you do not cool the peppers and beef before you place them onto the egg roll wrapper, the heat and the moisture will make the wrapper fall apart while you are trying to roll them.

Once the peppers and beef are cooled, take them out of the refrigerator and pat them with a paper towel to absorb any excessive moisture.  Now it is time to start building your rolls.

Place  your egg roll wrapper on a paper plate (you can purchase egg roll wrappers in your grocery store) and start with a layer of beef and then a layer of peppers in the middle of the wrapper.  Top the beef and peppers with shredded cheese.  Here I have used two different types of cheddar cheese but you can use any type of cheese you desire.  Do not overfill the wrapper or it will split and fall apart.  Once you are done layering, pull the bottom corner of the egg roll wrapper up over the layered mixture and gently pull it back a little bit toward you so you have a nice little pocket at the bottom of the roll.  Pull both side corners of the wrapper over the pocket that you created and then roll the mixture up almost to the top corner of the wrapper.  Before you roll it all the way, wet the very top corner of the wrapper with some water or a beaten egg yolk using the tip of your finger or a pastry brush.  Then finish rolling the wrapper making sure that very top corner is sealed.  Repeat this process until all of the beef and peppers have been used.  This recipe should make about 10 to 12 rolls.

Your roll should look similar to this when you are done.

When you are done making your rolls, preheat a saute pan to medium high heat and add about three to four table spoons of peanut or olive oil (depending on the size of your pan) and add three or four rolls to the pan. Cook the rolls until they are crispy and golden brown on all sides.  Remove the rolls from the pan and place them on a plate lined with paper towels to cool a bit.  Repeat this until you have cooked all of the rolls. I would tell you the best way to serve them and what to serve them with but they are usually just taken straight out off the cooling plate seconds after coming out of the pan.  They are eaten just about as fast as I can make them!

I really do enjoy this dish as much as I cringed initially at the thought of putting steak and cheese in an egg roll wrapper.  They are simply delicious and when you put steak and cheese in an egg roll, it is a meal not an appetizer.  This has become a popular meal in my house and I have to say that the process is much faster and easier than making an authentic egg roll.  While they are by no means a replacement for my beloved egg rolls, I have to admit that they are a huge crowd pleaser and putting a smile on some one's face with food is the ultimate goal!


Enjoy!


Wednesday, May 27, 2015

Saco River Dinner

The Elusive Maine Brown Trout
The Maine Brown Trout, also known as German Brown Trout, Brownie, Loch Leven Trout, and Swiss Lake Trout was first introduced to the United States in the 1800's.  One of the first areas of this country that it was introduced to was Branch Lake in Ellsworth, Maine in 1885.  The Brown Trout is often mistaken for landlocked salmon because of it's silvery coloration but the typical Brown Trout is a yellowish brown with large brown, black or reddish spots at it's sides.  

For years my husband has referred to this fish as "the elusive Brown Trout." In fact, it has been given that distinction by many Maine fisherman over the years.  It has been said that the Brown Trout is very clever and as difficult as they can be to catch, getting one on your hook is only the beginning of the battle.  The Brown Trout is clever enough to attempt a number of different strategies to escape after being caught.  It will actually try to tangle the line around different obstacles in the water and if that does not work; it will perform a variety of different acrobatics out of the water to escape.  My husband was lucky enough to win the battle with the Brown Trout in the picture above and I was all the more lucky to be able to enjoy my first taste of Brown Trout this season on Mother's Day this year.

Rather than focus on a specific recipe, I would like to talk more about the different ways of preparing and cooking this delicious fish.  I think a Mainer's first instinct would be to fillet the fish, dredge it through some flour or cornmeal and fry it up in a pan with lard, bacon fat or butter. There is nothing wrong with that long standing tradition!  It is an easy and incredibly delicious way to prepare this fish especially at camp when you have a bunch of hungry mouths to feed.  

A more sophisticated preparation would be to bake the trout in parchment paper.  This preparation is called Trout en Papillote.  It is not nearly as difficult a preparation as the name is to pronounce.  To prepare the fish this way, you simply cut two pieces of parchment paper large enough to cover the trout.  Score the fish on both sides by cutting small slits into the flesh until you feel the bone.  Place the fish on one of the pieces of parchment paper and add garlic, onions, lemon, herbs or anything else that you may desire to cook the fish with.  Drizzle some olive oil over the fish and place the second piece of parchment paper over the top.  Fold up the ends of both pieces of parchment paper to make a pouch and to seal the fish inside.  Cut a couple small slits in the top of the pouch and place into a small baking pan to cook for about 15 minutes.  

You can also poach a trout like you would a salmon by placing it into a large skillet on top of a bed of lemons, onions, and garlic with about 2 cups of chicken broth, water or white wine.  Season the fish with sea salt and cracked black pepper to taste.  Cover the skillet and lightly simmer the fish for 8 to 10 minutes.  This preparation is especially good served on a nice bed of greens or over a salad. Trout prepared this way is so light and mild tasting.  It is a great alternative to salmon if you are not a fan of the stronger tasting fish.

My personal favorite preparation for Brown Trout is as simple as the rest but the most flavorful way to prepare it in my opinion.  After the fish has been dressed (gutted), I stuff it with lemon slices, garlic and fresh herbs.  I score the fish on both sides and season with sea salt, cracked black pepper, more fresh herbs and drizzle with olive oil.  I place the whole fish, head and all, onto a piece of tin foil and wrap the sides of the foil up around it leaving a small opening for steam to escape. Then I throw the fish onto a hot grill for about 10 minutes or until the flesh becomes flaky and you can peel the skin off.  

You can eat every part of this fish including the skin and eyes.  It is mild and a little bit on the oily side; which only adds to the flavor in my opinion.  My personal favorite part of the fish is the cheeks.  Yes...fish have cheeks!  They are the tiny pocket of meat just below the eye.  The taste and texture of the cheek is similar to a scallop.  They are quite small on a brown trout but are delicious and should not be wasted no matter the size.  

Now that you have been  given a number of preparations to try, the only thing left to do is go out and catch yourself a nice Brown Trout.  I can promise you that it will be the only challenging part of the meal.  If your attempts to catch one fail, you can always visit your local fish market and buy a trout, salmon or any other fish and use one of these preparations on them just the same!

Enjoy!

Thursday, May 14, 2015

Super Quick Super Food Side Dish

Grilled Brussel Sprouts & Radishes
I am sure you all remember my very first Super Food Side Dish featuring brussel sprouts; well I am bringing back my favorite Brassica and paring it with another one of my favorites...the radish.  The radish is a relative of the brussel sprout, in fact, they are both part of the mustard family.  Vegetables belonging to the mustard family are called Brassicas or Brassicaceae.  The older name for Brassicas is Crucifers or Cruciferea meaning "cross-bearing" describing the four petals of the mustard flowers resembling a cross on the stem or the stalk of the plant.  It came as no surprise to me at all to learn that these two vegetables are in the same family.  I crave one equally as much as the other and it seems fitting to me that they are both cross-bearing creations sent to us from the Heavens!

This is a really quick and easy side dish to prepare with very few ingredients and since the grilling season is upon us, I decided to cook these on the grill tonight.  Here are the ingredients
1 pound of brussel sprouts, 1 pound of radishes, olive oil, balsamic vinaigrette, 1 clove of garlic, crushed red pepper flakes, sea salt and cracked black pepper.

In a large bowl, combine 1 pound of brussel sprouts, each cut lengthwise 3 or 4 times depending on the size, 1 pound of radishes, each cut in half, two tablespoons of olive, two tablespoons of balsamic vinaigrette, 1 large clove of garlic minced, 1 teaspoon of crushed red pepper flakes, sea salt and cracked black pepper to taste.  Give all of the ingredients a good stir to thoroughly combine.

My Grilling tool
To cook my brussels and radishes on the grill, I am using my new grill Wok. You can find one of these in any kitchen store.  You can also use any kind of vegetable grilling basket or you can go really rustic and make a cooking basket out of tin foil.  Any of these tools will work just fine.

Turn your grill on to medium heat and grill the vegetables, stirring frequently, until both the brussel sprouts and radishes are nicely charred and are fork tender. Remove from the heat and serve them as a meal or with just about any main dish you are serving up.

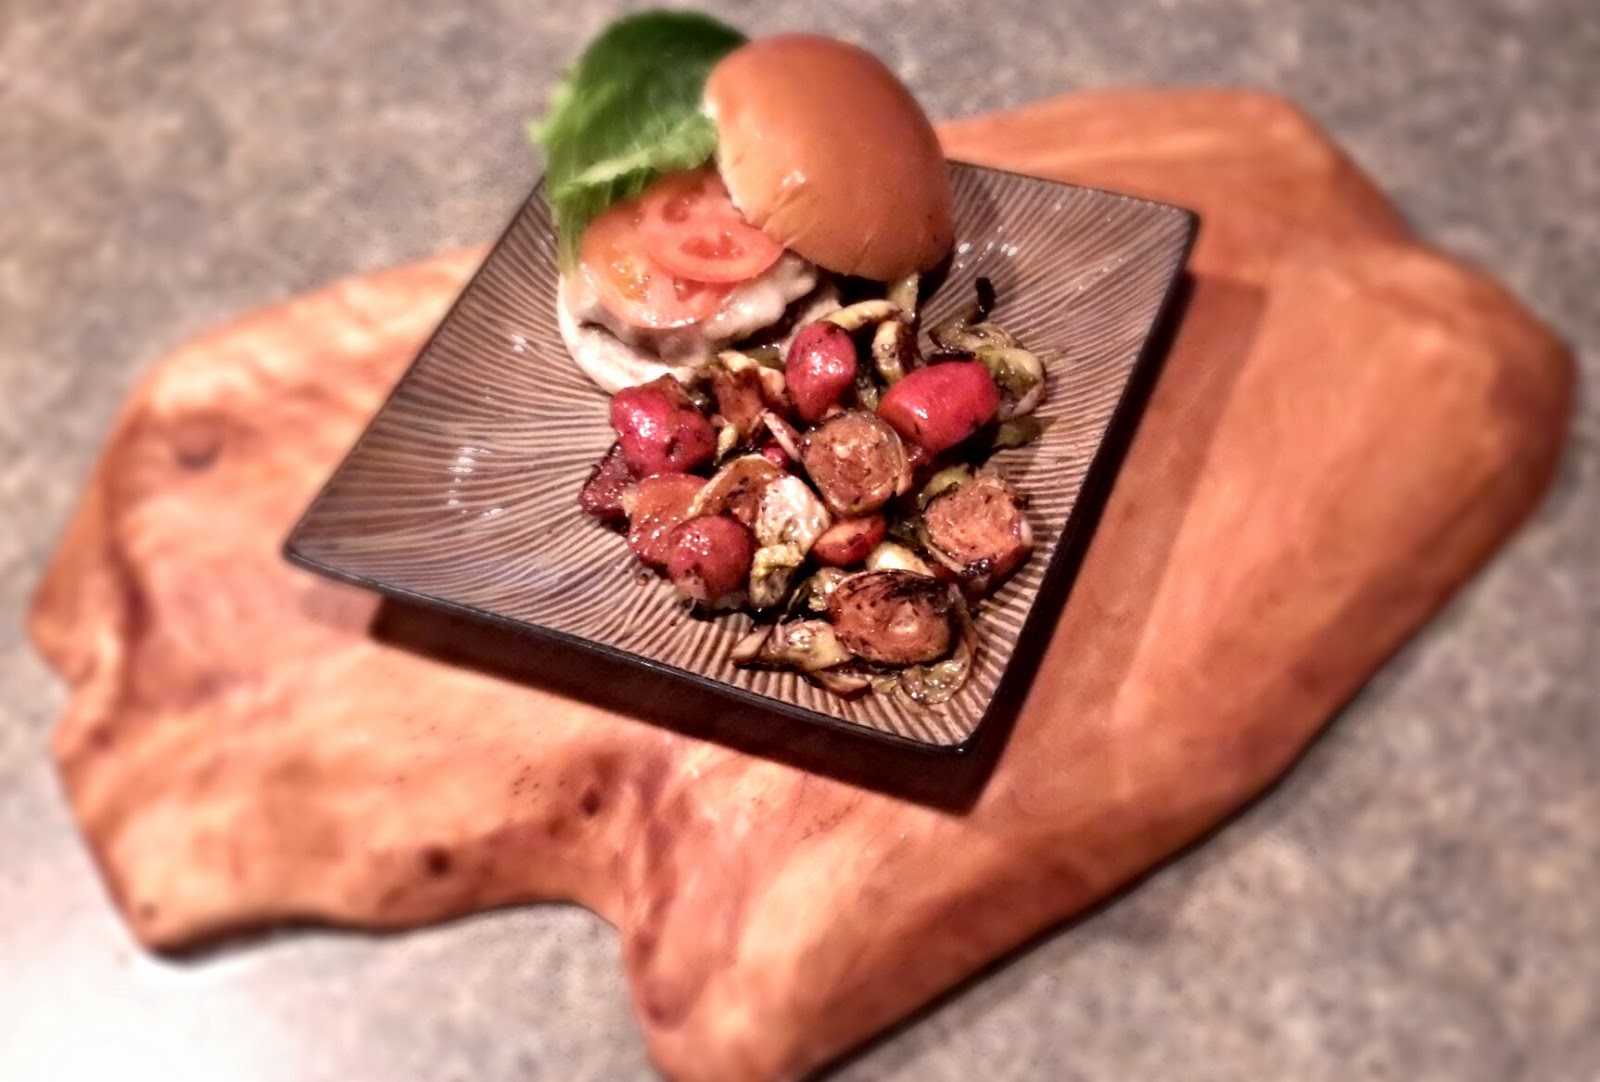
Call me crazy, and many people do, but I love to serve this side dish in place of french fries or potato chips with a sandwich or a burger.  I adore the earthy and pungent flavors of both of these vegetables. They really compliment each other quite well.  The radish, that usually offers a little bit of a spicy note when eaten raw, can become surprisingly sweet when grilled or sauteed; which is perfect when paired with the nutty flavor of the brussel sprout.  I could go on and on about how much I love this dish but I think I will just let you get to the business of cooking it and trying it for yourself.


Enjoy!